Homemade Cinnamon Candy Apples
Highlighted under: Celebration Cooking
I absolutely love making homemade cinnamon candy apples, especially during the fall season. The sweet and spicy aroma fills my kitchen, bringing back wonderful memories of visits to local fairs. There’s something so satisfying about transforming crisp apples into a glossy treat coated in a rich red cinnamon syrup. My friends and family can't resist them, and I love watching their faces light up with joy when they take their first bite. It’s a delightful project that not only tastes fantastic but also adds a festive touch to any gathering.
Making cinnamon candy apples is a fall tradition that I cherish deeply. The process is so engaging; I enjoy experimenting with different spices and sugar levels to find the perfect balance. Once, I even added a dash of nutmeg for an extra kick, and it was a hit among my friends! A key detail is to ensure the apples are dry, as moisture can prevent the candy from adhering properly, making it crucial for a perfect finish.
One thing I learned from a past attempt is to work quickly when dipping the apples in syrup. This helps create that shiny, crunchy coating that everyone loves. It’s best to have everything ready before starting so that you can focus on enjoying the process and making beautiful treats that look as delicious as they taste. Trust me, you’ll want to share these with everyone!
Why You'll Love These Cinnamon Candy Apples
- Crispy apples enveloped in a sweet, spicy glaze
- A fun, festive treat perfect for parties and gatherings
- A nostalgic recipe that brings the fall spirit to life
The Importance of Apple Selection
When making cinnamon candy apples, the choice of apples plays a crucial role in the overall taste and texture. Opt for firm varieties like Granny Smith, Honeycrisp, or Fuji that can hold their shape during the candying process. The tartness of Granny Smith apples provides a delightful contrast to the sweetness of the candy, while Honeycrisp apples will add a balance of sweet and tart flavors. Just ensure you wash and dry your apples thoroughly; any wax or moisture can prevent the candy from adhering properly.
It's also essential to choose apples that are similar in size for even cooking and coating. If you find that some apples are larger, you may want to cut them down slightly to maintain uniformity. Remember, the freshness of your apples matters too. Fresh apples not only taste better but also yield a firmer texture that stands up to the candy coating.
Mastering the Candy Coating Technique
Achieving the perfect candy coating requires attention to detail, particularly when it comes to temperature. Cook the syrup until it reaches exactly 300°F; this hard crack stage ensures the coating will harden properly. Use a high-quality candy thermometer and monitor the syrup closely to avoid overshooting the temperature. If you do miss the mark and find your syrup too grainy or scorched, your coating may not hold up well on the apples.
Once you dip the apples, let the excess syrup drip off completely before placing them on parchment paper. This not only ensures a smooth, glossy finish but also prevents the syrup from pooling at the base of the apples, which can lead to a sticky mess. For a signature finish, allow the candy apples to set in a cool, dry place for about 30 minutes—this will ensure the candy hardens to a delightful crunch.
Serving and Storing Your Candy Apples
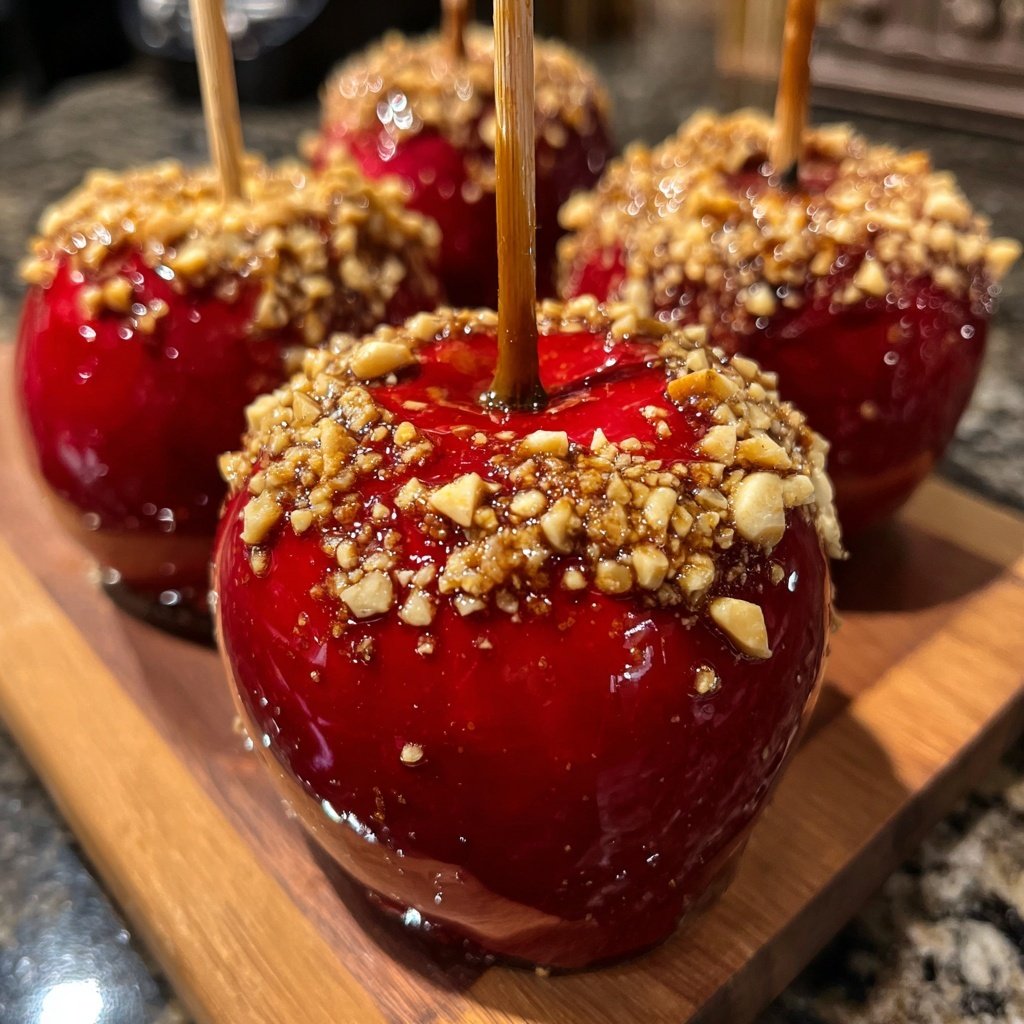
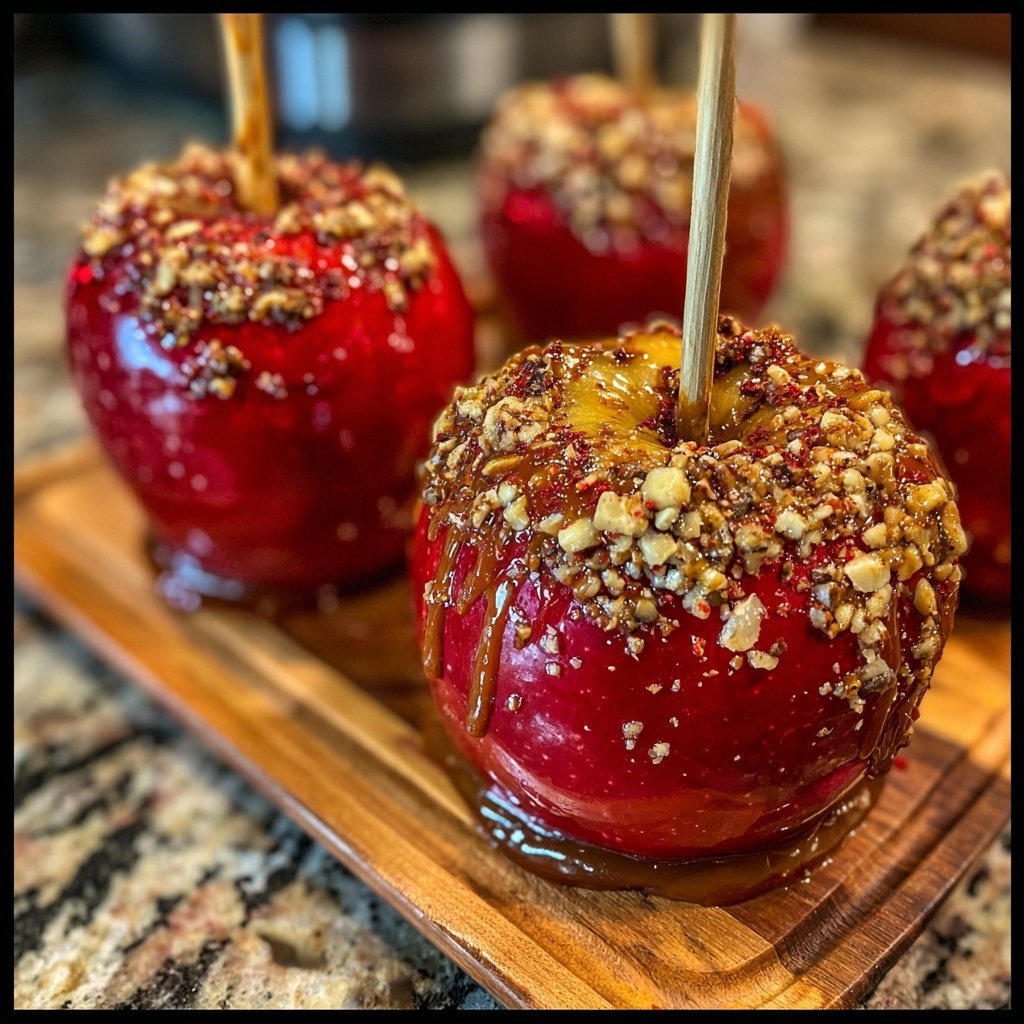
Once your cinnamon candy apples have cooled and set, they can be displayed proudly at any fall gathering. For a festive presentation, consider arranging them on a platter with some decorative elements like fall leaves or mini pumpkins. Drizzle some melted chocolate over the top or sprinkle them with crushed nuts for an added visual and textural dimension; these variations can elevate your candy apples from great to extraordinary.
If you're curious about storing any leftover candy apples, it's best to place them in an airtight container in a cool, dry place. Avoid refrigerating them, as the moisture can cause the candy coating to become sticky. These delicious treats are best enjoyed within a week. However, I’ve found that they are often gone much sooner—who can resist that rich cinnamon aroma and shiny candy coating?
Ingredients
Gather these ingredients to get started on your delicious cinnamon candy apples:
Ingredients
- 8 medium-sized apples, washed and dried
- 2 cups granulated sugar
- 1 cup water
- 1/2 cup light corn syrup
- 1 teaspoon ground cinnamon
- 1/4 teaspoon red food coloring (optional)
- Wooden sticks or skewers
Make sure to prepare your apples thoroughly for the best results!
Instructions
Follow these steps carefully to create your candy apples:
Prepare the Apples
Insert a wooden stick into the core of each apple, pushing it about halfway through to ensure it stays secure during the dipping process.
Make the Candy Mixture
In a medium saucepan, combine sugar, water, corn syrup, and cinnamon. Stir until the sugar dissolves, then bring the mixture to a boil over medium heat.
Add Food Coloring (Optional)
If you're using food coloring, add it to the bubbling mixture for that classic candy apple hue. Stir well to combine.
Cook to the Right Temperature
Using a candy thermometer, cook the syrup until it reaches 300°F (hard crack stage). This step is crucial for the candy to set properly.
Dip the Apples
Remove the saucepan from heat and carefully dip each apple into the syrup, swirling to coat evenly. Let the excess syrup drip off.
Set the Apples
Place the dipped apples on a baking sheet lined with parchment paper. Allow them to cool completely until set.
Enjoy your homemade cinnamon candy apples as a delightful treat or gift!
Pro Tips
- Keep the syrup hot while working. If it begins to cool and thicken, you can gently reheat it to maintain a smooth coating consistency.
Ingredient Substitutions and Tips
While granulated sugar forms the base of the candy mix, you can experiment with brown sugar for a richer, caramel-like flavor. Just keep in mind that brown sugar may affect the texture slightly, so you might need to adjust cooking times. If you prefer a sugar-free alternative, consider using a sugar substitute specifically designed for candy-making, but be sure to follow the manufacturer's instructions for ratios and cooking temperatures.
For a variation on flavor, you can incorporate other spices like nutmeg or clove into the syrup. Just a dash can transform the profile and make your candy apples even more aromatic and festive. Remember, the key to a successful flavor infusion is to add these spices early in the cooking process so they have time to fully disperse throughout the syrup.
Troubleshooting Common Issues
If the candy coating isn't setting, first check the cooking temperature. It must reach the hard crack stage, so if you're unsure, a quick temperature probe can help. If the candy appears too soft even after cooling, there's a chance it didn’t reach the correct temperature. If you find the syrup too thick and difficult to work with, adding a small amount of additional water can help achieve a more fluid consistency before cooling.
Another common issue is the candy apple coating not adhering well. If you encounter this, make sure the apples are completely dry and that you don't work in a humid environment, as moisture can prevent the syrup from sticking. Also, ensure you're applying an even layer of candy; unevenly coated apples can lead to dramatic peeling or cracking.
Questions About Recipes
→ Can I use any type of apple?
Yes, but firmer varieties like Granny Smith or Fuji work best for candy apples due to their crisp texture.
→ How do I store leftover candy apples?
Store them in an airtight container in a cool, dry place for up to several days.
→ Can I add toppings to my candy apples?
Absolutely! You can roll them in crushed nuts, sprinkles, or even drizzle with chocolate after the candy coating sets.
→ Is the red food coloring necessary?
It's optional! The food coloring is mainly for the classic look, but the candy will taste just as good without it.
Homemade Cinnamon Candy Apples
Created by: Arden Whitlock
Recipe Type: Celebration Cooking
Skill Level: Intermediate
Final Quantity: 8 apples
What You'll Need
Ingredients
- 8 medium-sized apples, washed and dried
- 2 cups granulated sugar
- 1 cup water
- 1/2 cup light corn syrup
- 1 teaspoon ground cinnamon
- 1/4 teaspoon red food coloring (optional)
- Wooden sticks or skewers
How-To Steps
Insert a wooden stick into the core of each apple, pushing it about halfway through to ensure it stays secure during the dipping process.
In a medium saucepan, combine sugar, water, corn syrup, and cinnamon. Stir until the sugar dissolves, then bring the mixture to a boil over medium heat.
If you're using food coloring, add it to the bubbling mixture for that classic candy apple hue. Stir well to combine.
Using a candy thermometer, cook the syrup until it reaches 300°F (hard crack stage). This step is crucial for the candy to set properly.
Remove the saucepan from heat and carefully dip each apple into the syrup, swirling to coat evenly. Let the excess syrup drip off.
Place the dipped apples on a baking sheet lined with parchment paper. Allow them to cool completely until set.
Extra Tips
- Keep the syrup hot while working. If it begins to cool and thicken, you can gently reheat it to maintain a smooth coating consistency.
Nutritional Breakdown (Per Serving)
- Calories: 200 kcal
- Total Fat: 0g
- Saturated Fat: 0g
- Cholesterol: 0mg
- Sodium: 5mg
- Total Carbohydrates: 52g
- Dietary Fiber: 2g
- Sugars: 50g
- Protein: 0g